I meant to have this post up several days ago. In fact the idea was for this to be a Christmas Eve post, but it didn’t happen. I was a little preoccupied by the snow/ice that decided to fall in the middle of the day. Then Obed and I decided to brave the snow and go to the Christmas Eve service at church, after work. It was a great service, lot of laughs and fun and the wonderful story of Christmas. Then we had to drive home and that is when the fun really started.
The snow that had fallen was light and fluffy and blew with the slightest wind, causing virtual whiteouts. While driving home we saw several cars that had gone off the road and where stuck in the snow. I wasn’t surprised because you couldn’t see the roads and there wasn’t a snow plow in site.
I was talking to my mother on the drive home and I was so nervous I had to get off the phone so I could concentrate on my nervousness. Does that even make sense? I just couldn’t really focus on the conversation when I was in fear of falling into a ditch somewhere. However my husband, who grew up in Florida and has driven in the snow on maybe two prior occasions did a wonderful job and got us home safe and sound.
As soon as we got home we released the hounds into the backyard and Obed too. The labs and Obed were loving the snow, but myself and my two little ones weren’t digging it so much at first. However they did do better the next day. In fact I couldn’t get them to come into the house. When everyone settled down we…..ok….Obed built a fire and we roasted some s’mores. Ahhhhhhh! 😛
I had homemade graham crackers and marshmallows leftover from s’more kits that I had made for Obed’s team at the office. I thought the kits would make a great gift and I got the idea from my very sweet and creative friend Beth at Stories of A to Z. I had a graham cracker and marshmallow receipe that I have been wanting to make from the lovely Smitten Kitchen and I finally got the perfect reason to give them a go . I made the label by using Scrapblog.com as Beth had suggested and used some trimmed brown paper bags for the packaging. I did the baking and Obed helped assemble the kits.
Everyone loved their little kit and the most popular question of the day was, “You can make marshmallows?”
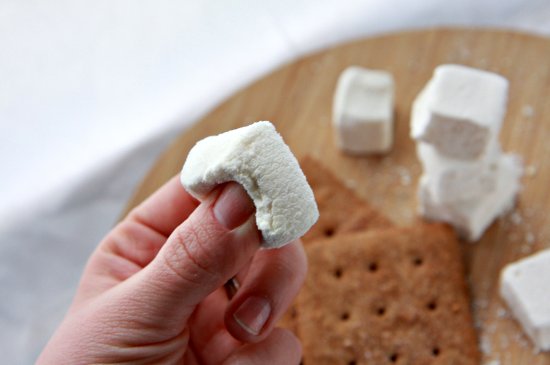
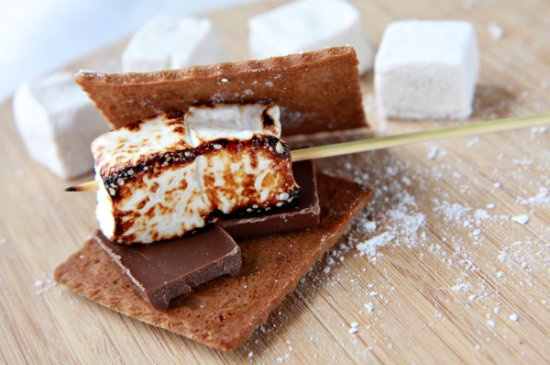
It was too funny how excited everyone was to have homemade marshmallows. These marshmallows were softer and fluffier then your store bought marshmallow, but the roasted just as well. The only thing you had to be cautious about was that they melt faster then the store bought marshmallow, making them easier to fall off the stick.
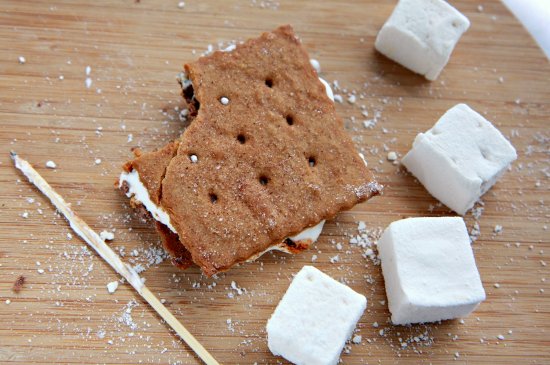
I put those previously fluffy, now sticky marshmallows between the two graham crackers with some chocolate and pressed it together and all the marshmallow goo’ed out the sides. It was a delicious site to see.
Then I took a bite and I was in heaven, a far more warm and cozy heaven compared to the blizzard conditions we were experiencing.
Yes I got marshmallow and chocolate all over my fingers and some on my nose and chin, but that is the measure of a good s’more…..is it not?
Oh behold the ooey, gooey goodness!
As much as I have raved about the marshmallow, let me not forget to mention the wonderful graham cracker. This homemade graham cracker has more flavor then any store bought graham cracker. First you can taste the sweet flavor of the honey and brown sugar and they have a firmer crisp then the crumbly texture of a store bought graham cracker. The store bought graham cracker is definitely without a doubt bland compared to these crackers, I may never go back.
Graham Crackers (adapted from Smitten Kitchen via La Brea Bakery and 101 cookbooks)
Yield: 10 large crackers
The original recipe called for the crackers to be chilled for 30 minutes after rolled out and cutting and to bake for 25 minutes. Because of time issues I did not chill the crackers before baking. Also, mine appeared to be done between 10 and 15 minutes, baking them for 25 made them over brown. It may just be my oven.
- 2 1/2 cups plus 2 tablespoons unbleached pastry flour or unbleached all-purpose flour
- 1 cup dark brown sugar, lightly packed
- 1 teaspoon baking soda
- 3/4 teaspoon kosher salt
- 7 tablespoons (3 1/2 ounces) unsalted butter, cut into 1-inch cubes and frozen
- 1/3 cup mild-flavored honey, such as clover
- 5 tablespoons whole milk
- 2 tablespoons pure vanilla extract
For the topping:
- 3 tablespoons granulated sugar
- 1 teaspoon ground cinnamon
In the bowl l of an electric mixer fitted with the paddle attachment, combine the flour, brown sugar, baking soda, and salt. Mix on low to incorporate. Add the butter and mix on low, until the mixture is the consistency of a coarse meal. You can also used a food processor, with a blade attachment.
In a small bowl, combine honey, milk, and vanilla extract and whisk. Add the honey mixture to the flour mixture and mix on low until the dough barely comes together.
Press the dough together and turn the dough out onto a lightly floured work surface. Shape the dough into a rectangle about 1 inch thick. Wrap in plastic and chill until firm, about 2 hours or overnight.
To prepare the topping: In a small bowl, combine the sugar and cinnamon, and set aside.
Adjust the oven rack to the upper and lower positions and preheat the oven to 350 degrees.
Once the dough has set and chilled, divide the dough in half and return one half to the refrigerator. Lightly flour your work surface and roll the dough into a long rectangle about 1/8 inch thick. The dough maybe sticky, so flour as necessary. Trim the edges of the rectangle to 4 inches wide. Working with the shorter side of the rectangle parallel to the work surface, cut the strip every 4 1/2 inches to make 4 crackers. Gather the scraps together and set aside. Place the crackers on one or two parchment-lined baking sheets and sprinkle with the topping.
Gather the scraps together into a ball, chill until firm, and reroll. Dust the surface with more flour and roll out the dough to get about two or three more crackers.
Using a toothpick or skewer, prick the dough to form three dotted rows about 1/2 inch for each side.
Bake for 15 minutes, until browned and slightly firm to the tough, rotating the sheets halfway through to ensure even baking.
Repeat with the second batch of dough.
Marshmallows (adapted from Smitten Kitchen via Gourmet Dec 1998)
Makes about 96 1-inch cubed marshmallows
Do ahead: Marshmallows keep in an airtight container at cool room temperature 1 week.
- About 1 cup confectioners’ sugar
- 3 1/2 envelopes (2 tablespoons plus 2 1/2 teaspoons) unflavored gelatin
- 1 cup cold water, divided
- 2 cups granulated sugar (cane sugar worked just fine)
- 1/2 cup light corn syrup
- 1/4 teaspoon salt
- 2 large egg whites or reconstituted powdered egg whites
- 1 tablespoon vanilla (alternately: 1/2 of a scraped vanilla bean, 2 teaspoons almond or mint extract or maybe even some food coloring for tinting)
Oil bottom and sides of a 13- by 9- by 2-inch rectangular metal baking pan and dust bottom and sides with some confectioners’ sugar.
In bowl of a standing electric mixer or in a large bowl sprinkle gelatin over 1/2 cup cold cold water, and let stand to soften.
In a 3-quart heavy saucepan cook granulated sugar, corn syrup, second 1/2 cup of cold water, and salt over low heat, stirring with a wooden spoon, until sugar is dissolved. This may take a bit, it took about 10 minutes for me. Increase heat to moderate and boil mixture, without stirring, until a candy or digital thermometer registers 240°F, about 12 minutes. Remove pan from heat and pour sugar mixture over gelatin mixture, stirring until gelatin is dissolved.
With standing or a hand-held electric mixer beat mixture on high speed until white, thick, and nearly tripled in volume, about six minutes if using standing mixer or about 10 minutes if using hand-held mixer. The hand mixer may take longer then 10 minutes…..but you can DO IT!
In separate medium bowl with cleaned beaters beat egg whites (or reconstituted powdered whites) until they just hold stiff peaks. Beat whites and vanilla into sugar mixture until just combined. Pour mixture into baking pan, scrapping can make for a sticky mess, oiling you spatula will help. Sift 1/4 cup confectioners sugar evenly over top. Chill marshmallow, uncovered, until firm, at least three hours, and up to one day.
Run a thin knife around edges of pan and invert pan onto a large cutting board. Lifting up one corner of inverted pan, with fingers loosen marshmallow and ease onto cutting board. With a large oiled knife or pizza cutter trim edges of marshmallow and cut marshmallow into roughly one-inch cubes. Sift remaining confectioners’ sugar back into your now-empty baking pan, and roll the marshmallows through it, on all six sides, before shaking off the excess and packing them away.


Great, thanks for sharing this blog article.Thanks Again. Will read on…
Meseidy – its been a few years since this post, but I found it and made ‘kits’ for my office. Homemade marshmallows were on my recipe “bucket list” for years. I was just too nervous to give it a try. But your post, along with the photos, provided the nudge to “just do it” [acknowledgements to Nike!] I will never go back to “store bought” on either the graham crackers nor the marshmallows. My favorite comment from one of my cubicle mates: “Oh my gawd! It’s like biting into a cloud!” I totally agree! Thank you and I hope you and yours have a wonderful holiday!
Great pictures and aren’t homemade marshmallows THE BEST??
I was swamped with finals and a winter semester class that I was unable to make homemade goodies for Christmas. I was especially down about it because I’ve been eyeing homemade marshallows for several months and knew it was the perfect gift! After reading your blog today, I am even more excited about making them. You have perfected the execution of the S’mores kit! I love the label and your description of each step. Thanks for posting all this great info. I’ll be making them for Valentine’s Day!
Love your depiction of being so nervous on the drive home that you had to hang up the phone in order to concentrate on your nervousness! So funny! This is a great post and your photos are beautiful. Those are the best looking homemade s’mores–and I mean REALLY homemade–that I think I’ve ever seen. The s’mores gift “kit” is a wonderful idea, too.
🙂 Jane
I’m in love with s’mores. This makes me want to actually stop being scared of marshmallow making and just DO IT.
These marshmallows are really very easy to make. The tricky part is not getting caught up in the web of stickyness.
This is the sweetest gift! I love the packaging and how you really homemade everything! 🙂
I seriously considered making the crackers and the marshmallows and then I came to my senses :). These look amazing and I’m sure the recipients of your gifts were thrilled. Yum.