If you follow me on facebook, twitter or instagram you probably saw that OB and I spent this weekend yarding and sweating. (I am aware that yarding isn’t a real word, is a Meseidy’isum…..it’s not a real word, right?) We worked hard leveling, laying out a weed barrier, laying stone and mulching, plus a few other things. But before any of that could happen a lot of sweat and tears had to happen first, and I am being serious about the tears.
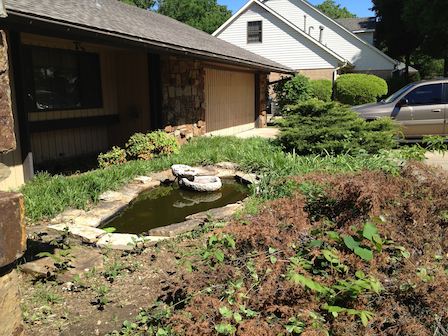
When we first moved into this new home, the front yard was less than desirable. It was over grown with mondo grass, dead shrubs and a pond that the Swamp Thing was probably lurking in.
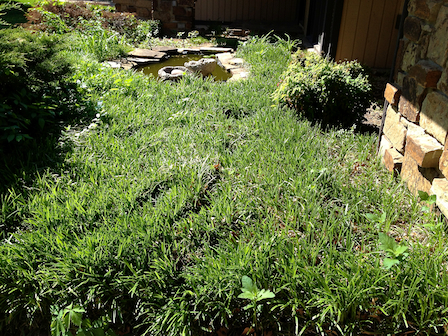
Not that you can tell but underneath all of that mondo grass were stepping-stones to the swamp. I thought I was going to find Rikki-tikki-tavi hiding in the grass hunting for snakes. Which would have been awesome because I loved that movie when I was a kid.
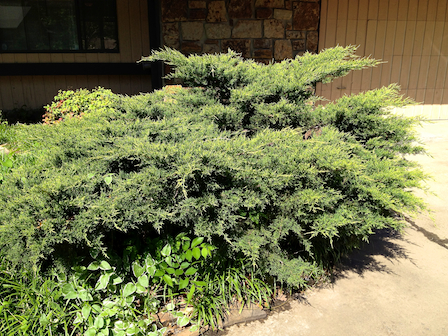
Then there was this thing, we didn’t even know where to begin with this thing. To be honest this whole landscaping/gardening thing is new to both of us, so we had no clue as to what kind of shrub this was. All we knew was that it was crazy, overgrown and well…..green.
Our first step was to conduct some research. We went to a local nursery here in Tulsa, Groggs Green Barn. It’s an organic nursery locally owned by a young married couple. They were very helpful and informed us that the bushy green thing in our front yard was a small juniper shrub. They gave us some pointers on how to prune it and a ton of ideas on how to tackle this huge overgrown green mess in the front yard.
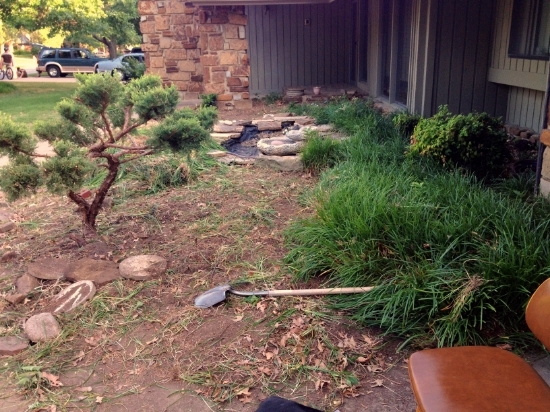
It was move in time and time to eradicate the mondo grass. OB started on a weekend and spent every evening after work for a week digging up a mondo amount of mondo grass. Under all of this grass, we found stepping-stones and flag stone edging the whole “garden”, I use that term loosely. Also, if you notice there on the left, the overgrown, bushy, green thing got a trim and was looking more presentable.
Finally after just over a week of OB digging and sweating, and me dealing with very dirty damp clothes, OB got the front garden clear and free of pretty much all vegetation except for the little juniper shrub. Here, you can see a little video that OB took of the cleared front garden. That night we went out and celebrated with steak.
You would think that by know the hard part was done, because that is what we thought, little did we know what trials awaited us. Once OB got all the grass cleared out it was time to figure out what to do with the swamp…..er pond. Again time for research. Upon the recommendation, of our dear friend JT we headed to Bixby and visited Hardscapes. This place is awesome! Anything and everything that you can think of that you would need for ponds, waterfalls, stone walls, pavers, anything you can think of they have it and they have the coolest displays.
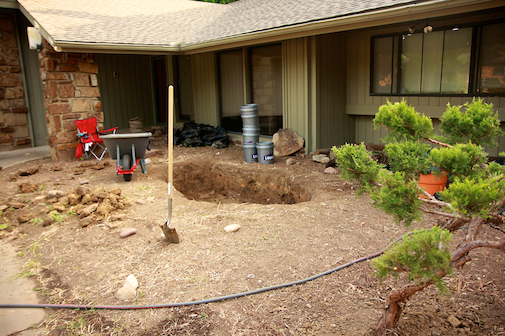
We asked questions. What were our options for this pond? What would we need? How could we make it presentable? The consensus was that it was too shallow; therefore, the algae was always going to be out of control. It was a shallow 10 inches the recommendation was at least 20 inches, 24 inches if we wanted fish. I didn’t want fish OB wanted fish; therefore, OB started digging.
After all the digging, we went back to Hardscapes to get supplies and discovered that the cost of doing a fish pond was going to be a wee-bit more than what we wanted to spend. While we were there, we came upon a display for a disappearing water feature. We both loved it, and I was glad that there would not be fish in my future. I already have four dogs for heaven sakes!
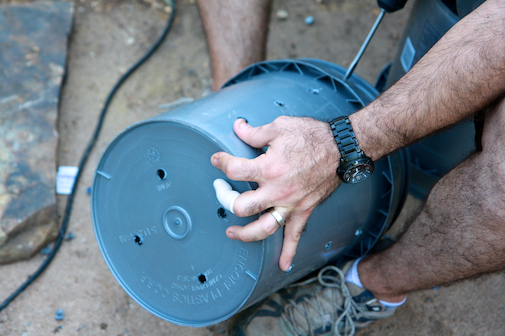
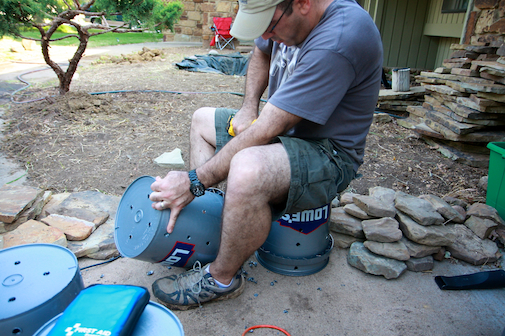
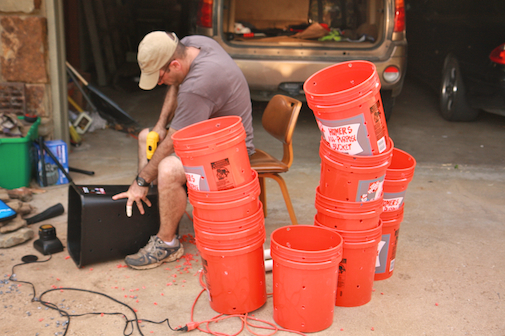
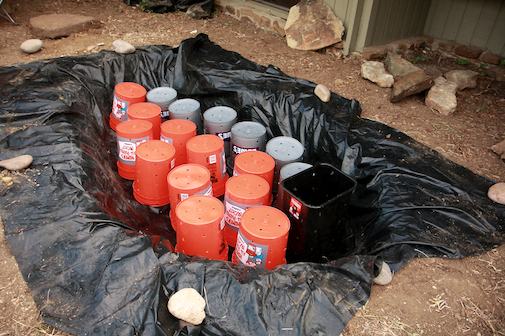
The idea of the disappearing water feature is that the water appears to fall right into the ground and disappear, when in fact it is falling into a hole full of stones and the water is just cycling through the pump, out the fountain and into the rock filled hole. In order to optimize our water and minimize our rock volume we went to our local hardware store and bought about 25 5 gallon buckets at $2.50 a piece and a $5 1/2 inch drill bit. OB then drilled holes all over the bucket. He also got a boo-boo in the process.
You can purchase a box that looks like a milk crate that will do the same thing, but they cost $50 bucks a piece and do the work of two $2.50 buckets, nuf said.
Here is another money-saving tip, when doing a water feature. When the sales dude tells you that you need a pump vault, which will run you about $150 bucks, take a pass and say you have it covered. Buy a $10 trash can, drill some holes in it and TA-DA you have a pump vault.
The picture you see here is round 1 OB vs. the disappearing water feature. Trying to economize we decided to recycle the pond’s existing liner. Later we would learn that would be a mistake. By this point, it was the Saturday of Memorial Day weekend.
Line the hole with a heavy-duty rubber liner, not a cheap plastic looking liner like you see here. Fit all of the buckets upside down in the hole and the “pump vault” right side up by the area you plan on putting your water feature. The purpose of the pump vault is to hold the pump and minimize it getting clogged by keeping things like grass and leaves out of the pump.
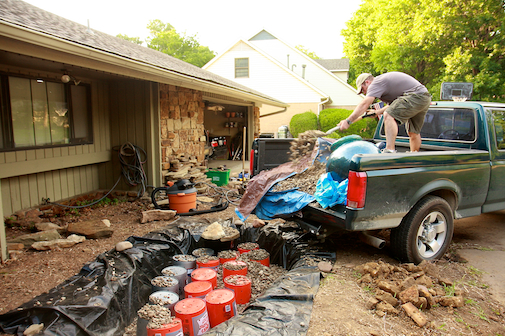
Cover the pump vault and start to fill the hole with rock, rock and more rock.
Over by where we placed the “pump vault” is the turquoise colored water feature. We laid it on a flat stone to keep it leveled and made sure that the water poured into the hole. Unfortunately, we under estimated how mush rock we would need to we came up short, and because of the holiday weekend Hardscapes was closed until Tuesday.
Jake however, took full advantage of the lack of rock. The following morning to our dismay we noticed that the water level had significantly dropped. The water was disappearing for sure but now how we wanted. It was apparent that there was a leak, which means OB had to dig the rock back out. At this point, we have reached the end of round 1 OB vs. the disappearing water feature. Water feature 1….Obed 0. 🙁
Stay tune for Part II and maybe even a post of “What I Learned by OB”.

Kudos for tackling such a home project! I always love these projects but I’m always afraid of even starting them. Can’t wait to read part II.
OMG!!! this post made me laugh!!! It sounds like my household. I too have a messy “garden” but I just haven’t had the time, the energy it takes, nor the $$$$$. Very nice, I can’t wait till P II.