This is a super easy project that anyone can do on the super cheap. I wanted some nice sconces for my guest bath downstairs. I looked high and low and couldn’t find anything I wanted and the ones I did like were about $20 a piece….story of my life. I couldn’t bring myself to spend $40 on 2 sconces for the guest bath.
A few weeks back I was strolling the Dollar Tree trying to see if there was anything that I could fashion into a sconce. I walked the whole store 3 times and came up empty. I left the store defeated and empty handed. Then as I was driving back home an idea hit me like I was smacked in the face with a cold dead fish. Why not a cold dead fish? You don’t like my metaphor? That is a metaphor right?
Anyway let us continue. I hit the breaks and turned into the dusty gravel lot of a produce stand, kicking up pebbles and dust, and did a U-turn. It was like a scene out of Dukes of Hazzard, but I was in a SUV instead of a Dodge Charger and my doors open.
I walked back into the Dollar Tree and grabbed 2 bags of decorative stones, glass tealight candle holders, a pack of glue sticks and some sponge brushes for $6. Then I made my way over to the hardware store and pick up some small “L” brackets and a small pack of picture handing hardware for $8.
I already has some wood at the house and some dark brown paint. I was going to cut the wood myself but then Obed forbid it, fearing that my on the cheap DIY would end up with a not so cheap emergency room bill.
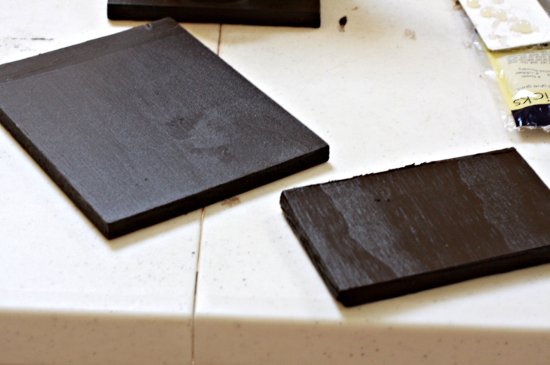
We had a wood board that was 1/2 inch thick. He cut 2 pieces of wood 7 x 5 1/2 and 2 more 3 1/2 x 5 1/2. I then sanded the rough edges off the wood and painted the front and sides and left them to dry.
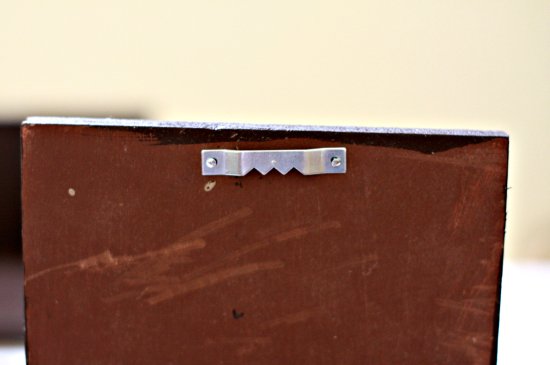
Once the paint dried I nailed the picture handing hardware to the back, top part of the larger rectangles.
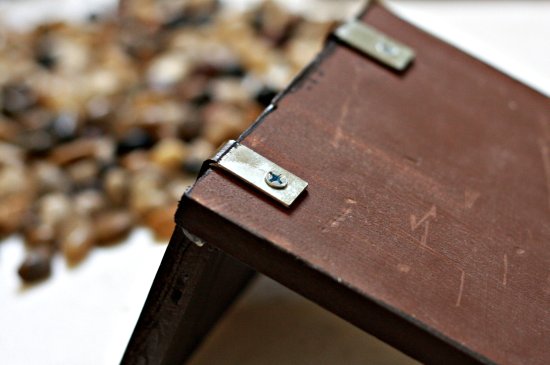
Then hot glued the small bottom piece onto the back. This is to just hold it in place while you secure the “L” brackets on.
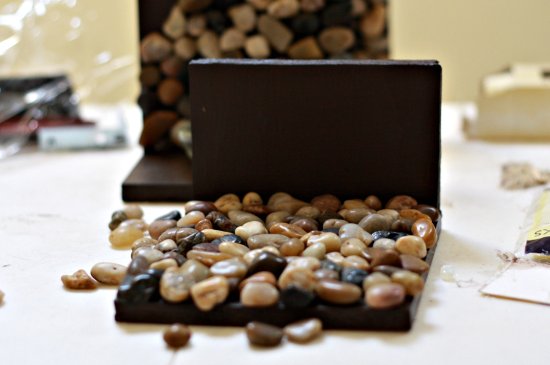
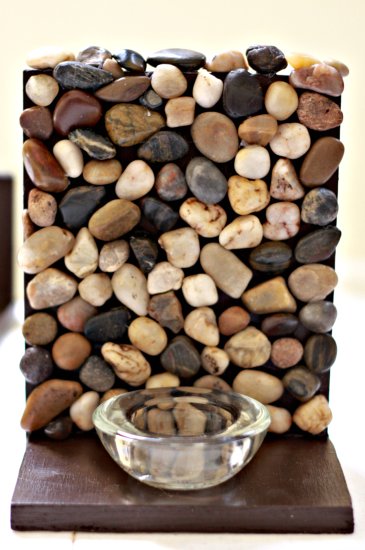
Lay the sconce down on it’s back and glue the stones onto it, trying to fit them together as tightly as possible. Start from the bottom working up, trying not to go over the sides, but finishing off over the top edge.
Using a hot glue gun, glue the candle holder to the bottom in the center, add a candle and ur done!
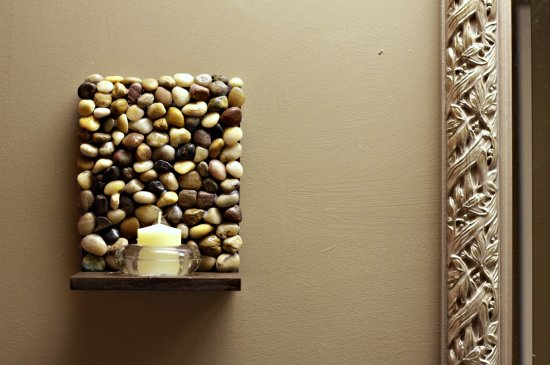
Checkout the finish product proudly handing on the wall.
I had some materials left and made two more for the dining room. So to make four, I estimate it cost me about $20 total. Not bad…*pat on the back*.
I could get use to this. 😀
I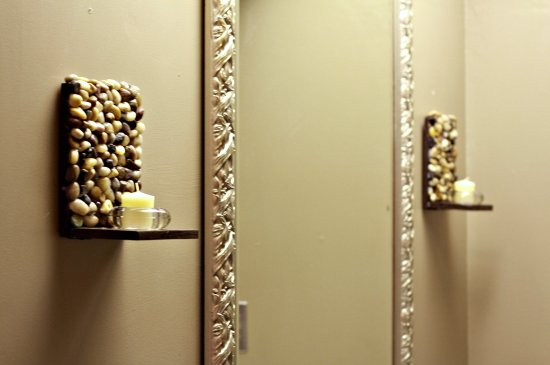
What you will need:
- 4 pieces of 1/2 inch thick wood cut 7 x 5 1/2
- 4 pieces of 1/2 inch thick wood cut 3 1/2 x 5 1/2
- 2 small bags of decretive stones
- 4 tealight candle holders
- 4 picture hanging hardware
- 8 1 inch x 1 inch “L” brackets
- sandpaper
- glue sticks
- glue gun
- paint
- sponge brush
I do like this idea and but the stones and I have my glue gun and the wood all together but the glued does not stick to the stone. Did you wash them first or something? Or are you using a special blue from your glue gun?
No, I just glued them on and let them set. I do remember using a lot of glue. It’s been a long time since I did this project.
Just had to comment on your post. I saw a picture of your sconce on another pinterest forum; however, no directions. Putting on my detective hat I kept searching and “Bazinga” I found your post. Love these and going out to get what I need to make them today. Can’t wait.
Happy blogging and thank you for your post.
Great idea! Thank you very much for this post.
Thanks for posting and inspiring my creative juices! The inspiration is like a cold dead fish hitting my face! LOL… Love it!
What glue did you use to glue the stones on , please?
Thank you
I used a hot glue gun.
Good day! I could have sworn I’ve been to this website before but after browsing through some of the post I realized it’s new to me.
Anyways, I’m definitely happy I found it and I’ll be bookmarking and checking back often!
It’s going to be finish of mine day, but before finish I am reading this wonderful post to increase my know-how.
Sweet DIY project! I am going to dust off my glue gun and try it out this weekend.
I love the stone sconces. They are beautiful and simple. I made two like yours but, I am worried the heat from the tea candles might affect the glue. Will the hot glue hold the stones in place if the sconces are used often?
“DIY Stone Sconces” universityofbridgeport genuinely causes
me personally imagine a tiny bit extra. I personally appreciated each and every individual element of this blog post.
Thanks for your time -Lazaro
I made 3 of these for my bathroom. I followed your directions and also included a little round mirror in the backing to reflect more light– these make my “home spa” days VERY relaxing- and my boyfriend loves them, too! Thank you for posting such a great idea!
Your post, “DIY Stone Sconces” ended up being worthy of
commenting here! Just needed to say you did a terrific work.
I appreciate it -Precious
That is so cool. I’m thinking of doing some for on the patio for some extra light.
this is very cool. Definitely a pat on the back to you.
1. this is great
2. poo on people who correct you from the comments. ye gods.
She did ask.
so fabulous!!
Its actually a simile…
But great work. These are amazing! Perfect gift idea too.
These are terrific. You could also wire these for a plug in lamp (perhaps make the base thicker to cover the cord. This is a terrific idea. Thanks for sharing!!!
I read it as “scones” too!
P.S. That’s a simile, not a metaphor. =P
This is easily the simplest yet most brilliant thing I have seen in a very long time! You should put this on the Instructables website! Seriously!
so Impressed!! Love the look
It’s decorative not decretive – anyway you did a good job they look nice
I stumbled across your blog and just loved this idea so I made my own. Thanks for sharing and for the great tutorial. I managed to make 2 of them for only the cost of the stones! I already had everything else. Here’s mine, if you’d like to see. http://smalleah.blogspot.com/2010/11/home-decor-stuff.html
🙂
Leah, I was going to take a look at your version too, but when I clicked on your link it’s set for invited readers only. Just wanted to let you know that unless people are invited, we can’t see how your projects turned out. 🙁
wooooww ?ahane !
I’ve done similar covering a small wooden birdhouse…cover the roof with greenery to appear like a thatch roof…!
..and proved that you really can do anything with a hot glue gun!
they look great!
Wow! I love it! I’m so making these.
I love your sense of humor and your DIY project is awesome.
I totally read the title as “scones” instead of “sconces”. Imaging my surprise?! Not so much interchangeable…
too cute!!! i love how natural they are and that they contrast next to the carved frame :
Those look great! Very clever idea!
Look at you go!! Those are gorgeous and you have given me an idea 🙂 Thanks
BTW love the Dukes of Hazzard scene…great visiual.